Cap Cut is a powerful video editing app that has become a go-to tool for creators. Whether you’re a beginner or a seasoned editor, mastering its features can take your videos to the next level. With its user-friendly interface and a range of creative options, Cap Cut offers endless possibilities for enhancing your content.
If you want to stand out, knowing a few Cap Cut hacks can make a huge difference. From smooth transitions to stunning visual effects, these tips will help you edit like a pro. Get ready to unlock Cap Cut’s full potential and elevate your video editing game!
Mastering Keyframe Animation
Keyframe animation is a game-changer when it comes to adding smooth movement to your videos. In Cap Cut, you can use keyframes to control the position, size, and rotation of objects throughout the video. This allows you to create dynamic effects, such as moving text, zooming in on clips, or making objects appear and disappear.
To master keyframe animation, start by selecting an object or clip, then add keyframes at different points in the timeline. Adjust the properties at each keyframe, and CapCut will automatically create smooth transitions between them. With practice, you’ll be able to bring your videos to life with professional-level animations.
Explanation of Keyframe Animation in Cap Cut
Keyframe animation in CapCut lets you control how elements move or change over time. By setting keyframes, you define specific points where an effect starts or ends. CapCut then creates smooth transitions between these points, making your edits feel more dynamic.
To use keyframes, simply select the clip or object you want to animate. Add a keyframe at the beginning and another at the end, adjusting properties like position, size, or rotation. CapCut will fill in the movement in between, giving you professional-looking animations with minimal effort.
Examples of Advanced Keyframe Techniques
One advanced keyframe technique is creating smooth object movements. By setting keyframes at different points, you can move an object across the screen in a fluid motion. For example, you can animate text that slides from the left side of the screen to the right, adding a dynamic effect.
Another technique is animating opacity changes. By adjusting the opacity with keyframes, you can make objects gradually appear or disappear. This is perfect for creating fade-in or fade-out effects, adding depth and a professional touch to your videos. These techniques make your editing more creative and engaging.
Utilizing Multi-Layer Editing

Multi-layer editing in CapCut allows you to stack multiple clips, images, and effects on top of each other, creating more dynamic and engaging videos. This feature is perfect for adding background music, text, and visual effects without disrupting the main content. It’s a simple way to add depth to your edits.
With multi-layer editing, you can control the timing and positioning of each element. This helps in creating seamless transitions between clips and adding creative flair to your videos. By mastering this technique, you’ll be able to make your content more visually appealing and professional.
How to Stack Multiple Videos, Images, and Text Layers
Stacking layers in CapCut is an easy way to create complex, multi-layered videos. You can add multiple videos, images, and text on top of each other by simply dragging them onto the timeline. Each layer appears above or below the other, allowing you to control the visibility and timing.
To stack layers, tap the “+” button and select the media you want to add. After placing each element, adjust the position, size, and timing to get the right look. You can even apply different effects to each layer, creating a rich and dynamic video composition.
Tips for Managing Layers to Avoid Clutter and Maintain Clarity
Managing layers effectively is key to a clean and organized video project. Keep your timeline simple by only using the necessary layers. Too many layers can cause confusion and slow down your workflow. Color-code or label layers for easier navigation, especially in complex projects.
Additionally, group similar elements together to stay organized. Use the “lock” feature to prevent accidental changes to important layers. Regularly review your layers to ensure everything is in the right place. This will help maintain clarity and make editing smoother.
Speed Adjustment for Dynamic Effects
Adjusting the speed of your clips is a simple yet effective way to add excitement to your videos. CapCut allows you to change the speed of a clip, whether you want to slow it down for dramatic effect or speed it up for fast-paced action. This feature helps you emphasize key moments and create engaging content.
To use speed adjustments, select the clip you want to modify and tap on the speed icon. From there, you can either increase or decrease the speed using the slider. Experiment with different speeds to find what works best for your video’s mood. It’s an easy way to make your editing more dynamic and visually captivating.
How to Adjust Video Speed for Slow-Motion and Time-Lapse Effects
CapCut makes it easy to adjust video speed for both slow-motion and time-lapse effects. To create a slow-motion effect, simply select the clip, tap on the speed icon, and reduce the speed. This will slow down the video, giving it a smooth, dramatic look. It’s perfect for highlighting key moments in your footage.
For a time-lapse effect, you can speed up the video by increasing its speed. Tap the speed icon, then slide the bar to make the video faster. This effect is great for showing long processes, like sunsets or cityscapes, in just a few seconds. Adjusting the speed is quick and simple in CapCut, allowing you to create powerful effects in no time.
Color Grading and Filters

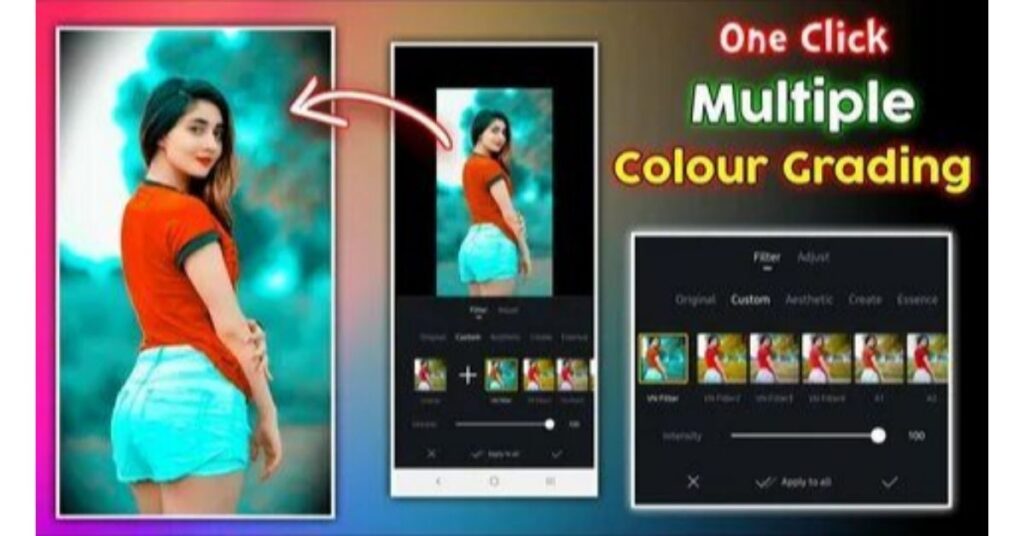
Color grading is essential for giving your videos a unique look and mood. In CapCut, you can adjust the brightness, contrast, saturation, and shadows to create a custom style. By fine-tuning these settings, you can make your videos pop or set a specific tone that matches your content.
CapCut also offers a variety of built-in filters that can instantly transform the vibe of your video. Whether you want a vintage feel or a modern, high-contrast look, these filters are a quick way to enhance your footage. Combine color grading with filters to elevate your video editing and make your content stand out.
How to Enhance Your Videos with CapCut’s Color Grading Tools
CapCut offers powerful color grading tools that can make your videos stand out. With these features, you can adjust the brightness, contrast, saturation, and more to set the perfect mood for your content. Whether you want a warm, cinematic look or a cool, vibrant feel, color grading gives your videos a professional touch.
To enhance your videos, simply go to the color grading section in the app. Play around with the settings until you achieve the desired effect. You can also use presets for quick adjustments or fine-tune every detail for a custom look. Color grading in CapCut helps elevate your editing and makes your videos visually appealing.
Green Screen and Chroma Keying
Green screen and chroma keying are powerful tools for creating stunning visual effects in CapCut. With this feature, you can replace a solid background with anything you want, like a custom scene or animation. All you need is a green background, and the app removes it, leaving you with just the subject in the frame.
To use this feature, import your footage with the green screen into CapCut, then apply the chroma key effect. Adjust the settings to fine-tune the removal of the green color, and your subject will appear against a new background. Whether you’re making a movie-like scene or adding creative visuals, green screen and chroma keying make your videos look professional and dynamic.
Explanation of How to Use the Green Screen Effect in CapCut
The green screen effect in CapCut allows you to replace a solid-colored background with any image or video you choose. To use it, first, make sure your video has a green or solid color background.
Then, import your clip into CapCut and select the “Chroma Key” option.
Once activated, adjust the color picker to select the green background. You can fine-tune the settings to remove any unwanted green shades. After that, add your desired background and position your clip accordingly. It’s a simple yet powerful way to create stunning visual effects in your videos.
Advanced Text and Animation Effects
CapCut offers a variety of advanced text and animation effects that can make your videos stand out. You can add eye-catching text overlays, choose from a range of fonts, and apply effects like fade-ins, typewriter animations, or even 3D text. These effects can be customized to fit the style and mood of your video, making it more engaging for your audience.
To take full advantage of these features, experiment with combining different text styles and animations. Play with the timing, transitions, and color to ensure your text complements the rest of the video. By mastering these advanced text and animation effects, you’ll be able to elevate the visual appeal of your content and create professional-quality videos with ease.
Exploring Text-to-Speech and Voiceover Features
CapCut offers a text-to-speech feature that turns your written words into realistic voiceovers. You can choose from various voices and languages, making it easy to add narration to your videos. This is perfect for creating content when you don’t want to record your own voice.
The voiceover feature also allows you to record directly within the app. Simply hit the record button, and you can add your own voice to your video. This gives you more control over your audio and helps make your videos more personal and engaging.
Using Music and Sound Effects Effectively
Music and sound effects are powerful tools that can enhance the emotional impact of your video. In CapCut, you can easily add background music or sound effects to match the mood of your content. Whether it’s upbeat music for a lively video or subtle sound effects for a cinematic feel, the right audio can elevate your video and keep viewers engaged.
To use music and sound effects effectively, ensure they complement the visuals and don’t overpower them. You can adjust the volume levels and sync audio with specific moments in the video for maximum impact. Experiment with different tracks and effects until you find the perfect combination that enhances the story you’re telling.
Tips for Adjusting Audio Levels and Removing Unwanted Noise
Adjusting audio levels is crucial for a balanced sound in your videos. In CapCut, you can easily adjust the volume of your clips by tapping on the audio track. Lowering background music and raising voiceovers will ensure your main audio is clear and easy to hear.
To remove unwanted noise, use CapCut’s built-in noise reduction tool. Simply apply the tool to your audio clip, and it will minimize any background distractions like hums or static. Fine-tuning these settings can help create a professional and clean sound, making your video more enjoyable to watch and listen to.
Pro-level Transitions
CapCut offers a variety of smooth, professional transitions that can elevate your video editing. These transitions help create seamless shifts between clips, adding flair to your videos. You can choose from effects like fade, slide, or zoom to make your content flow effortlessly.
To use pro-level transitions, simply drag them between two clips on the timeline. CapCut allows you to adjust the duration and style of each transition, making it easy to match your video’s tone. With just a few clicks, you can create eye-catching transitions that enhance the overall look of your project.
A Guide to Using Custom Transitions Between Clips
Custom transitions in CapCut can add a unique touch to your videos. Instead of relying on the default transitions, you can create your own for a smoother flow between clips. This gives your video a professional and personalized feel.
To use custom transitions, simply overlap two clips in the timeline. Then, choose the “Transition” option and explore the available effects. You can adjust the timing and style to suit your video’s theme. With custom transitions, you can make your editing stand out and keep your audience engaged.
FAQ’s
What is CapCut?
CapCut is a free video editing app that offers powerful features like keyframe animation, effects, and transitions for creating high-quality videos.
How do I use keyframe animation in CapCut?
To use keyframe animation, select an object, add keyframes at different points, and adjust the properties to create smooth transitions between them.
Can I create custom transitions in CapCut?
Yes, you can overlap clips and use the transition tool to add custom effects, adjusting timing and style for a unique video flow.
Is CapCut free to use?
Yes, CapCut is completely free, with a wide range of features available without any subscription or purchase required.
What types of videos can I edit with CapCut?
CapCut is ideal for editing social media videos, tutorials, vlogs, and any creative content that requires smooth, professional editing.
Conclusion
In conclusion, mastering these CapCut hacks can elevate your video editing skills and take your content to the next level. With features like keyframe animation and custom transitions, you can create smooth, dynamic videos that stand out. Whether you’re editing for social media or personal projects, these tips will help you work faster and more creatively.
By incorporating these techniques, you can unlock the full potential of CapCut and bring your ideas to life with ease. So, start experimenting with these hacks and see how they transform your editing process. Get ready to impress your audience with stunning videos!


